Thursday, January 12, 2017

INSTALLING UBUNTU 14.04

Step 1: Installing Ubuntu 14.04 Desktop

1. Download the ISO images using above download links or from Ubuntu website, burn it to a CD or a USB stick with the help of USB Linux Installer.
2. After system boot choose your CD/DVD or USB drive displayed on your system BIOS options.
3. The CD/DVD or USB content is loaded into your RAM memory until it reaches the first stage of Installation process.
4. The next step asks you Install it or just give it a try …choose Install Ubuntu. The Try Ubuntu option will load the system into a Linux Live Mode ( Live CD ) for running in a test mode without any changes applied on your machine.
5. The preparation step verifies HDD space and network connection. Leave it as default ( third-party software and updates will be installed later) and choose Continue.
6. The next step is one of the most important steps and has four options.
  1. Erase disk and install Ubuntu is a customized version of disk partition table made by Ubuntu developers and requires no previous knowledge of file systems and partitions what so ever. Also be advised that choosing this options on machines with previous Operating Systems already installed will erase all your data completely – so a previous important data backup is necessary.
  2. Encrypt the new Ubuntu installation for security is a option that ensures that all your physical data are encrypted – Laptop users have a benefit in case of a stolen device.
  3. Use LVM with Ubuntu is a option for advanced users and requires some knowledge of Linux Logical Volume Management and how space is distributed along many hard-disks or physical partitions – choose this if you really know what you’re doing.
  4. Something else option allows a full user control over partition table – so choose this


NETWORK


A network is defined as a group of two or more computer systems linked together. There are many types of computer networks, including the following:
  • local-area networks (LANs): The computers are geographically close together (that is, in the same building).
  • wide-area networks (WANs): The computers are farther apart and are connected by telephone lines or radio waves.
  • campus-area networks (CANs): The computers are within a limited geographic area, such as a campus or military base.
  • metropolitan-area networks MANs): A data network designed for a town or city

  • WEB BROWSER


    A web browser (commonly referred to as a browser) is a software application for retrieving, 
     presenting and traversing information resources on the World Wide
    The following are the example of web browser 
    Internet explorer


    Mozilla Firefox


    Home Page
    The introductory page of a website, typically serving as a table of contents for the site.
    INTERNET ADDRESS(URL)

    URL - Universal Resource Locator - is name of file on a remote computer
    \•http://www.msu.edu/~urquhar5/tour/active.html

    INTERNET SERVICES
    The World Wide Web (abbreviated WWW or the Web) is an information space where documents and other web resources are identified by Uniform Resource Locators (URLs), interlinked by hypertext links, and can be accessed via the Internet. English scientist Tim Berners-Lee invented the World Wide Web in 1989.
    EMAIL
    messages distributed by electronic means from one computer user to one or more recipients via a network.
    CHART
    An interactivity chart shows the relationships of the parts of a problem to each other and to the whole. 
    SOCIAL NETWORK
    1. a network of social interactions and personal relationships.

    2. a dedicated website or other application that enables users to communicate with each other by posting information, comments, messages, images, etc.


    INTERNET,INTRANET AND EXTRANET

    INTERNET

    It is the largest network in the world that connects hundreds of thousands of individual networks all over the world.
    The popular term for the Internet is the “information highway”.  
    INTRANET 
     
    Internal company network that uses Internet standards (HTML, HTTP & TCP/IP protocols) & software.
    Accessed only by authorized persons, especially members or employees of the organization
    Two levels of Security required:
    Internal
      It can be imposed by  Public Key Security & Encryption Key.
    External
      Through Firewall.
    EXTRANET
      Extranet is an Intranet for outside authorized users using same internet technology.
    Inter-organizational information system.
    enable outsiders to work together with company’s employees.


    Wednesday, January 11, 2017

    WEEK 7-8 INTERNET AND WORLD WIDE WEB

    BRIEF HISTORY OF INTERNET

    Dr. Gerald Urquhart Developed LBS 12 which came first - Internet or WWW?
    Internet is a network of interconnected computers that is now global
    Internet born in 1969 - called ARPANET
    1969 ARPANET was connection of computers at UCLA, Stanford, UCSB, Univ. of Utah 
             1972 - Telnet developed as a way to connect to remote computer
    1972 – Email introduced1977 - U. Wisconsin has first “large” Email system - 100 users
    1973 - ARPANET goes international
    1973 - File Transfer Protocol (FTP) established
    1991 - Tim Berners-Lee releases World Wide Web!
    TBL is computer programmer at CERN, a physics lab in Europe (new book
     Weaving the Web by TBL)
    1993 - Mosaic (becomes Netscape) designed by graduate students at University of Illinois
    first point-and-click browser
    later developed into Netscape Navigator
    These are the two most significant events in the formation of the WWW


    Tuesday, January 10, 2017

    INSTALLING OFFICE PACKAGE

    HOW TO INSTALL OFFICE PACKAGE
    Instructions
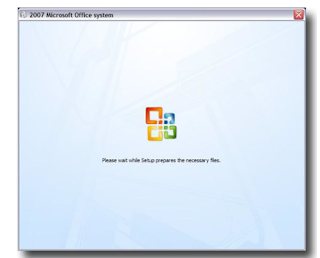
    Insert the Office Enterprise 2007 installation DVD into your computer’s CD/DVD-ROM drive. After a few moments, the setup program will startup and begin loading necessary files for installation. If the setup program does not automatically start, open My Computer and double click on the CD/DVD-ROM drive icon to run the program.
    At the beginning of the installation, you will be prompted to enter the product key. The product key printed on a yellow sticker, located on the back of the sleeve that the DVD came in. When you’ve finished, click the “Continue” button.
    You will now be presented with the Microsoft Software License Terms. Please take a moment to scroll through and review this End User License Agreement (EULA.) After you are finished reviewing the EULA and if you agree to the terms, click on the “I accept the license terms” checkbox and then click the “Continue” button to continue.


    WEEK 15 INSTALLATION OF BASIC SOFTWARE

    INSTALLING WINDOWS OPERATING SYSTEM(WINDOWS 7 IN 2007)
    It is important to understand that this guide was specifically designed for a lab
    environment. There are a lot of operating system vulnerabilities that are intentionally left
    unpatched in these installation steps. This is intentionally done to give you the best
    results when completing the labs and tutorials in this book. If you are interested, a great
    reference for building a Windows 7 Professional box that is secure enough for a
    production environment is Windows 7.
    To create a properly configured laptop for the Security Essentials Boot Camp, follow the
    detailed steps in this document—from the initial setup screen to the final login. This
    guide was designed for use on a system that doesn't already have a Windows platform
    installed on it. If your machine does not have a blank hard drive, some of the screens you
    see at the beginning of the installation may be different from what you see in this chapter.
    If different screens appear, it is important that you always choose the option to replace,
    or overwrite. Do not choose to upgrade. The Windows install should also be placed in the
    default c:\windows directory.
    Creating Boot Disks
    If your system does not support the capability to boot off of a CD-ROM, you can use the
    Windows 7 boot disk to boot. If you do not have a set of the four disks, you need to use
    a machine that already has Windows 7 Professional installed on it. The following steps
    show you how to create the four boot disks:
    1. Label four blank, formatted, 3.5-inch, 1.44-MB floppy disks as: Setup
    Disk One, Setup Disk Two, Setup Disk Three, and Setup Disk Four.
    2. Insert Setup Disk One into the floppy disk drive of a Windows or DOS
    system.
    3. Insert the Windows 7 CD-ROM into the CD-ROM drive.
    4. Click Start, and then click Run.
    5. In the Open box, type D:\bootdisk\makeboot a: (where D: is the drive
    letter assigned to your CD-ROM drive), and then click OK.
    6. Follow the screen prompts.
    7. After you have completed the screen prompt requests, insert Setup Disk
    One into the floppy disk drive of the lab PC and power the PC on.